![]()
Using Lights & Charger
Modern 6 volt / 3 watt hub dynamos can not only power lights on your bike at night, they can provide power to charge your cell phone or a GPS while you ride during the day. For best results, you should turn your lights off while charging so as to have all of the hub's power available for charging, or disconnect your cell phone or GPS from the charger while using the lights.
The headlight is wired to the hub, as is the charger. The charger converts the A.C. (alternating current) from the hub dynamo to D.C. (direct current). D.C. is required to charge a battery. The chargers come in two styles. One style is a small box that can be kept in a handlebar bag or strapped to a tube of your bicycle's frame with rubber "O" rings. See this page for the E-WERK. See this page for the USB-WERK. The other style fits in the top of the steerer tube on bikes having a 1-1/8" threadless steerer tube. See this page for The Plug.
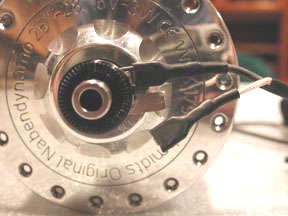
If you have a Schmidt SON dynamo hub with connectors such as you see in the photo above, you'll need the regular 4.8mm female spade connectors at the end of your headlight wires, and "piggyback" connectors at the ends of the wires to the charger. Technically, that's not correct, since you could have piggybacks on the headlight wire and plain 4.8 connectors on the charger wire. But many people already have a headlight with regular 4.8mm connectors, so on this page I'll always refer to the headlight having 4.8mm connectors and the charger having piggyback connectors.
See this page for general wiring instructions.
See this page for specific instructions for using the Co-Axial wire.
If you have a SON SL hub, only some of what I write on this page applies to you. SON SL hub installations require a special fork, don't use the 4.8mm connectors on the axle, and eliminate the need to connect and disconnect wires from the hub when you install or remove the dynamo hub.

On the left is a piggyback connector. On the right is a standard 4.8mm female connector. They both attach to a 4.8mm male connector the same way. The difference is simply that the piggyback connector has a 4.8mm male connector extending from it.

Here the standard 4.8mm connector is attached to the piggyback connector.
Making The Connections

Here's a Schmidt SON28 hub with its two 4.8mm male spade connectors embedded in the axle.

Here, the wires connecting the hub to the charger are shown with piggyback connectors attached.

And here the wires to the headlight have been attached to the piggyback connectors. This is how the parallel connection is made.

And here's another view of the completed parallel connection. The piggyback connectors are at the bottom, closer to the hub shell. The 4.8mm connectors for the headlight wire are just above.
With some versions of the SON the male space connectors are closer to the end of the axle than with other versions. There's no harm in mounting the piggybacks so that the male connectors are on the hubshell side, giving you more clearance between the wires and the dropouts.
When disconnecting the wires you'll generally want to remove the piggybacks from the hub, taking the other connectors along for the ride so to speak, that way you keep the headlight wires connected to the charger wires and don't have to reassemble those connections. The SON has no polarity, so either wire can attach to either spade connector.
Schmidt has put together a kit of spade connectors and shrink tubing for shops installing and servicing lights.
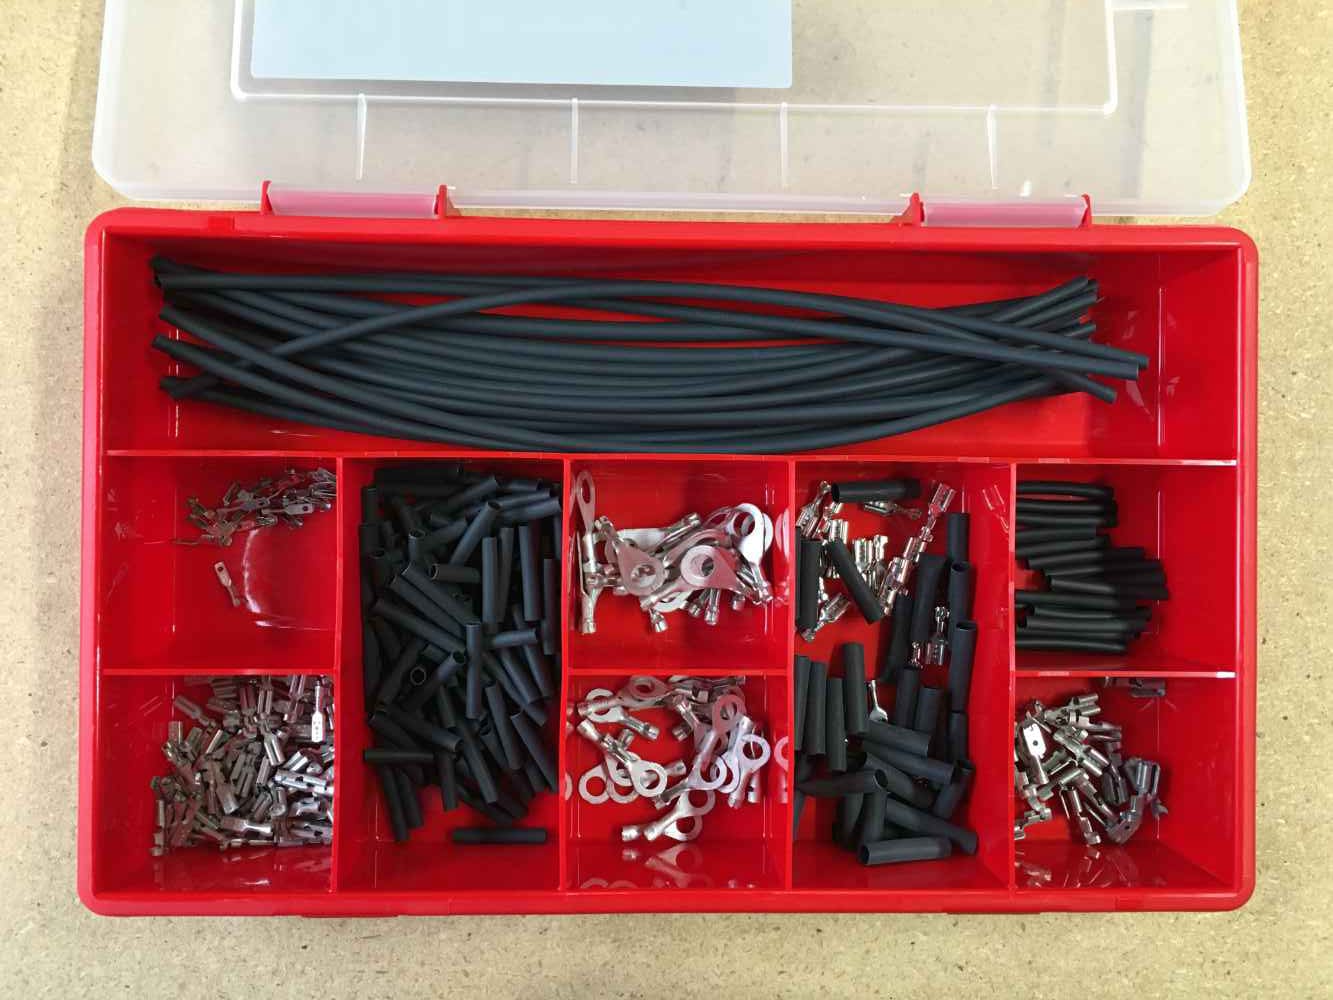
Schmidt box with assortment of spade connectors and shrink tubing, Part # SCH72800, Price: $ 131.00
If and when you run out of any connectors or shrink tubing, don't worry, since we stock all of these connectors and shrink tubing separately. See below for the kit with components for Co-Axial connections.
Download instructions for soldering the Co-Axial connectors.
An Even Better Way To Do It
It's more expensive, but if you're buying both an Edelux II headlight and charger for your SON hub, you can have a cleaner installation by using the "new for 2018" Co-Axial Adapter with "Y Junction".

The Co-Axial Adapter takes the place of two standard 4.8mm female spade connectors, and provides a female Co-Axial connector right at the hub axle. Then you have a Co-Axial wire with a male Co-Axial connector at the hub end, and at the other end of that wire there's a Y Junction where you can connect both your headlight and your taillight. The Y Junction can be positioned anywhere you like on the bike; wherever it's most convenient. The Y Junction requires some soldering, but we can do that for you here. You just tell us how long you want the wires to be and we'll take care of the rest.

Co-Axial Adapter & Male Co-Axial Connector for soldering, Part # SCH72630, Price: $ 44.00

For the "do-it-yourselfer" we have the Y Junction with 80cm of Co-Axial cable attached, and a loose male Co-Axial Connector included. And this is what we would start with if you ask us to make a Y Junction for you with a cable length less than 80cm.
The kit includes shrink tubing.
Y Junction with 80cm Co-Axial cable & loose male Co-Axial Connector, Part # SCH72631, Price: $ 44.00

If you want the Y Junction box to be near your handlebar, an 80cm cable to the hub will typically be long enough. So this kit gives you a male Co-Axial connector already attached, 80cm from the Y Junction. From the far end of the Y Junction you insert a Co-Axial wire and solder the connections inside the box. And you get a Co-Axial Adapter, plus another Co-Axial connector for your other device to plug into the Y Junction.
Instructions are included. And of course you can have us do the soldering here for a small labor charge. You can send us your existing light and/or charger for us to solder connectors to its wire as well. If your light or charger doesn't have co-axial wiring, we will first splice Schmidt Co-Axial wire to your wire and then install these connectors.
The kit includes shrink tubing.
Y Junction with 80cm Co-Axial cable, attached male Co-Axial Connector and Co-Axial Adapter,
Part # SCH72635, Price: $
89.00

Here's the Y Junction installed in the Edelux II wire.
Schmidt has put together a kit of co-axial connectors, shrink tubing and soldering jigs for shops installing and servicing lights.
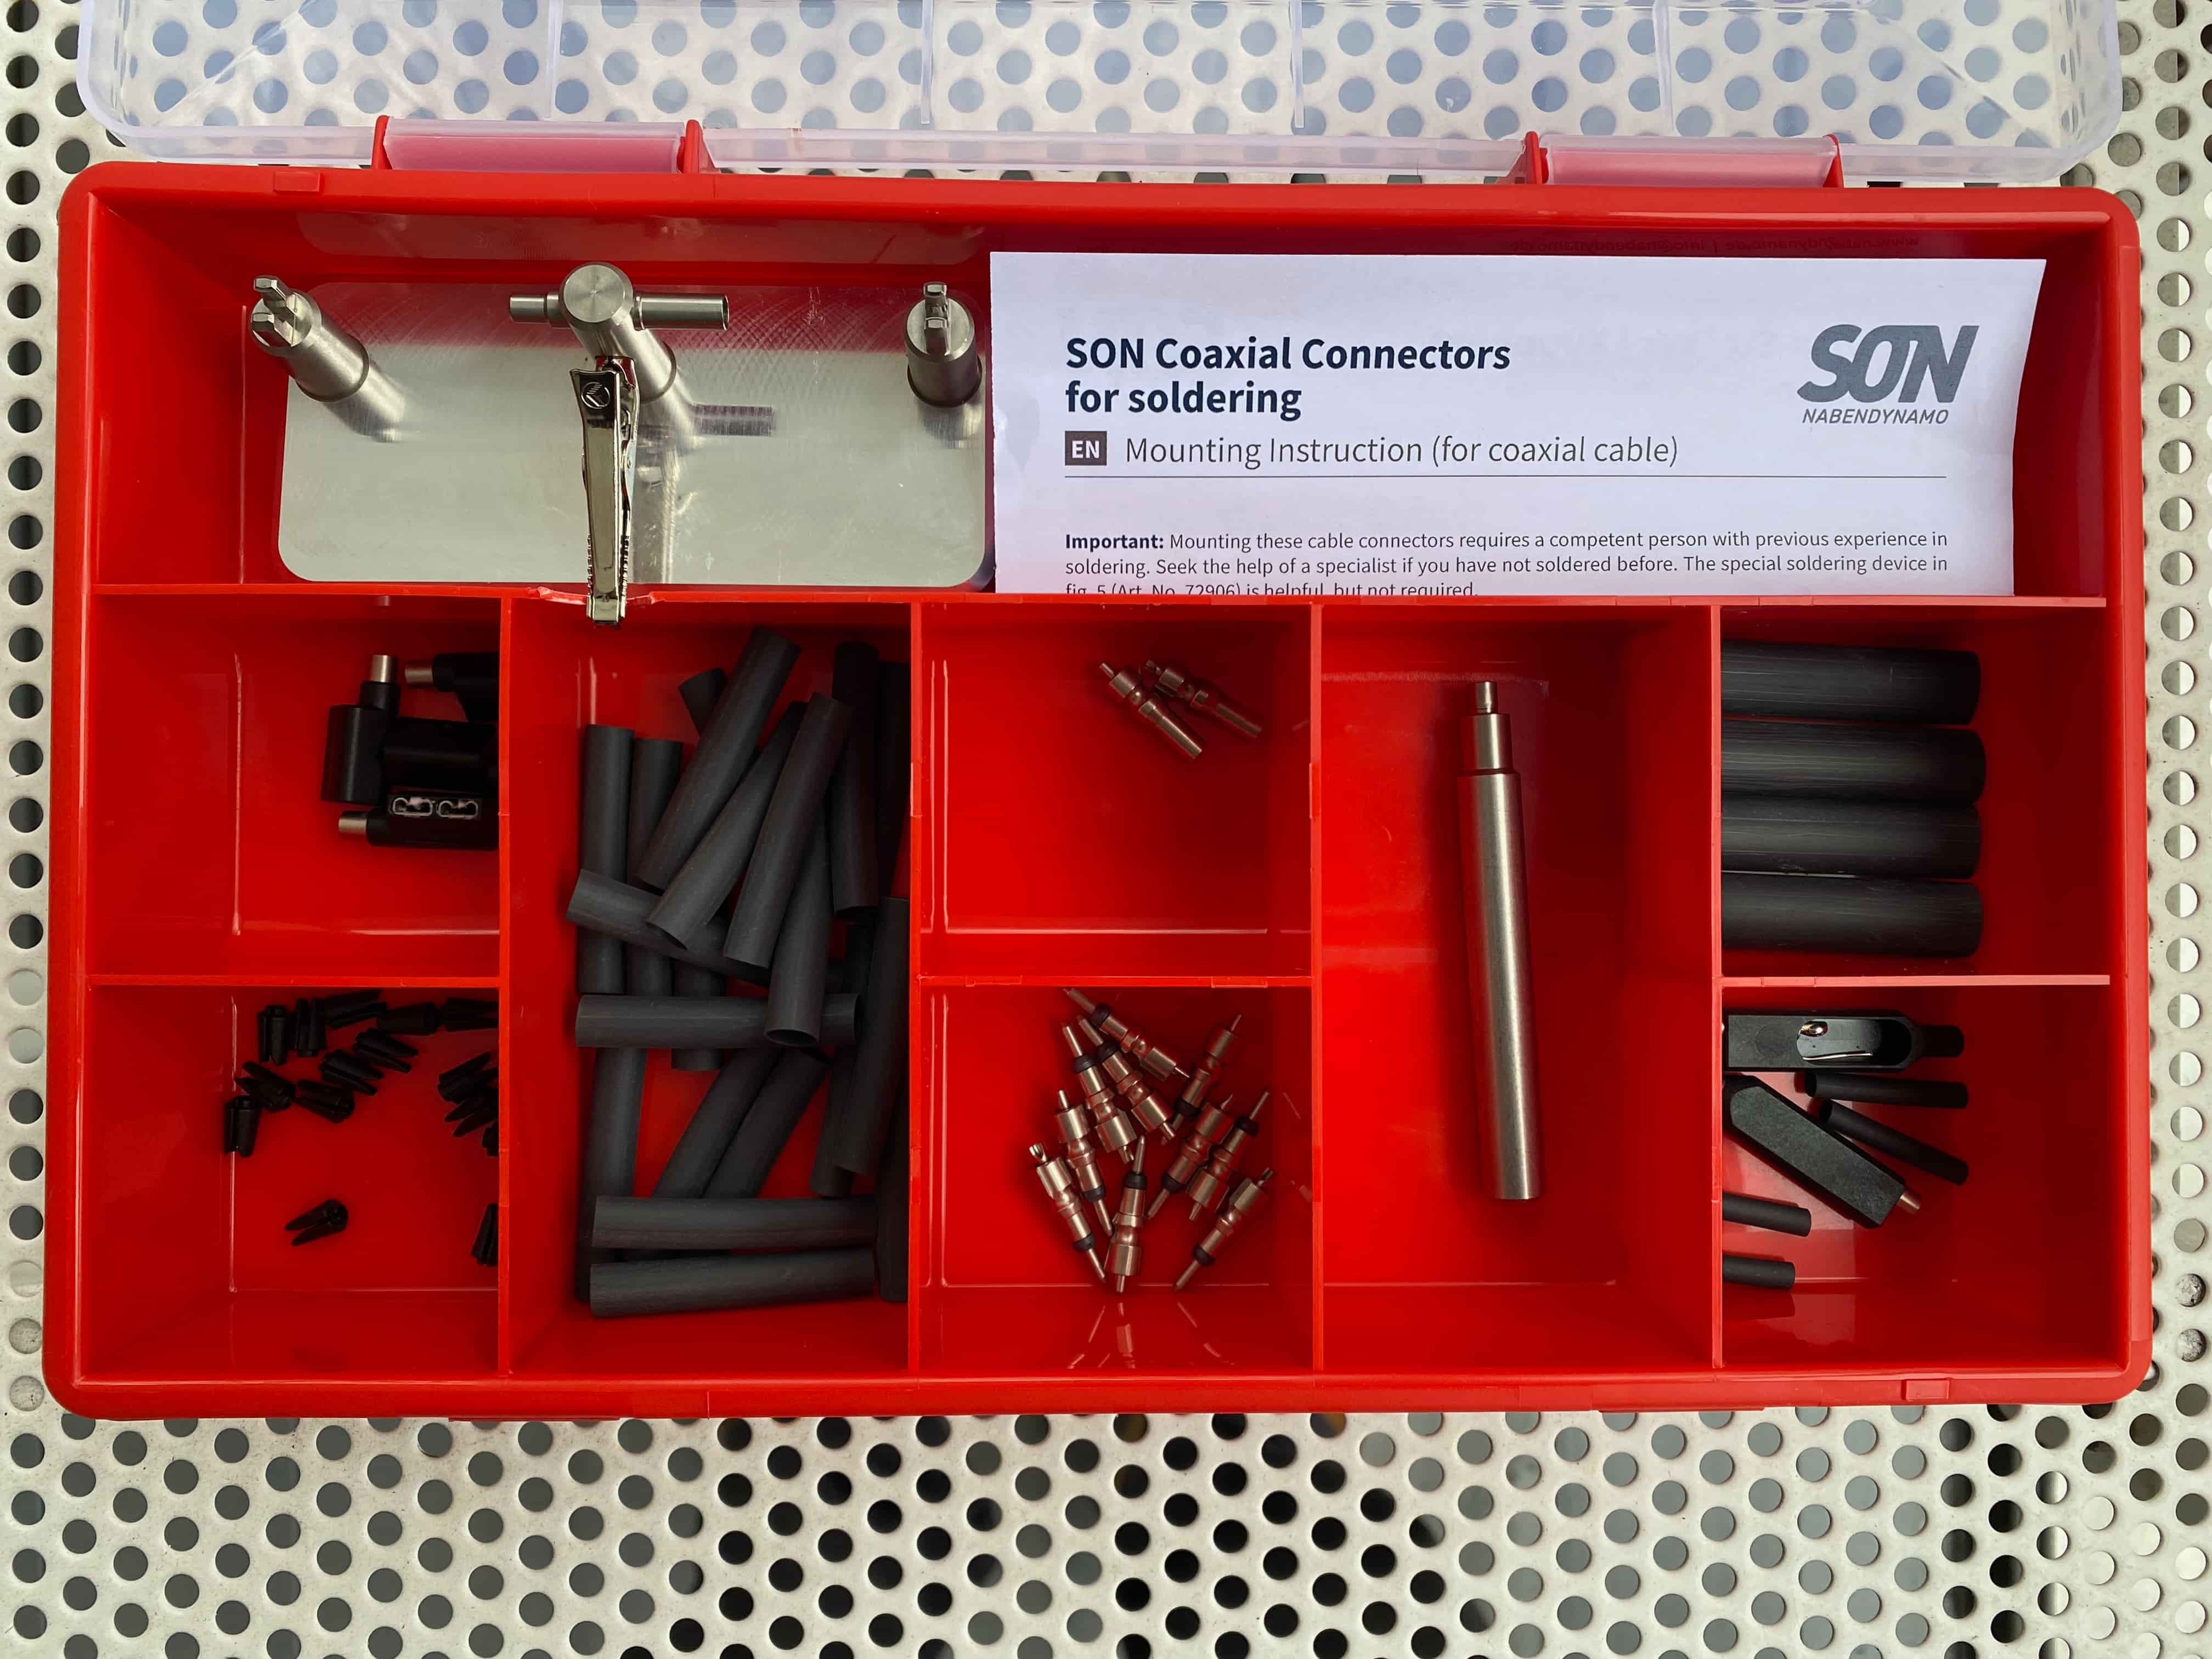
Schmidt box with assortment of Co-Axial connections plus the jig for soldering, Part # SCH72650, Price: $ 372.00
All of the parts in this kist are available individually. So as you use up the parts in the kit, you can get individual replacements from us.
Jig for Soldering
Schmidt makes a handy jig for holding the Co-Axial Connectors and the Co-Axial wire while soldering the connections. Download this PDF for photos and instructions for its use. The jig has fixtures for both the female and the male Co-Axial Connectors.
Schmidt jig for soldering Co-Axial Connectors, Part # SCH72906, Price: $ 69.60
When charging your GPS or cell phone, turn off the lights for the fastest charge times. At night, don't have your cell phone or GPS plugged into the charger and your lights will be at full brightness.
To see how to mount headlights and taillights, go to the mounting lights page.
Back to Schmidt hub page
Back to Lighting Systems page
Back to: Peter White Cycles LLC home page
Penny is the Lord High Executioner of Email. So please send your email to Penny.
Mail to:
The email link above uses some fancy javascript voodoo to hide the actual address from spambots. Your browser needs to be set to run javascript in order for you to use any of the email links on my website. If you can't see the links, you can call us. You can also type the address into your email software. First, type the alias, "penny". Then type the "@" sign. It's above the number 2 on your keyboard. Then type the domain, "peterwhitecycles.com". Don't put in the quotes! That should do it.
You can also call us at 603 478 0900
It's best to call before 4PM Eastern time since after that we're either running around like headless chickens or at home ready to jump into the pot.
Please don't place an order without first reading this.
This page updated: Tuesday, March 10, 2020
Peter White Cycles LLC
24 Hall Rd.
Hillsborough, NH 03244
USA
603 478 0900 Phone